
A very happy new year to all of you out there. I hope the last year was great for you all and this year brings happiness for all of you.
This is my first post for this year and in this we are going to look into all the options that we encounter during publishing a workbook on tableau sever.
Once you have created your workbook on tableau desktop, you can publish it on to the tableau server so that all others can have a look into the great work that you have done . To publish our workbook we need to select at the server option available at the top pane and then select publish workbook.
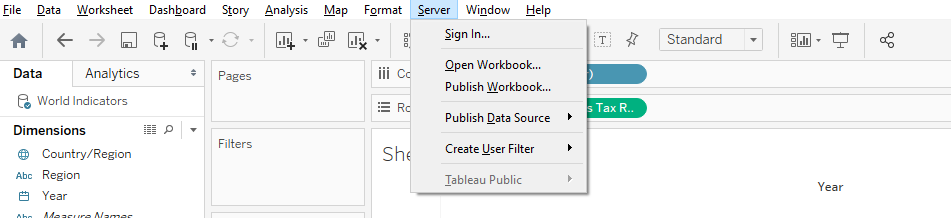
If you do not see this option highlighted , make sure you are at the workbook page or a dashboard and not at the data source pane.
Once you click on the link , a window pops with multiple options as under:
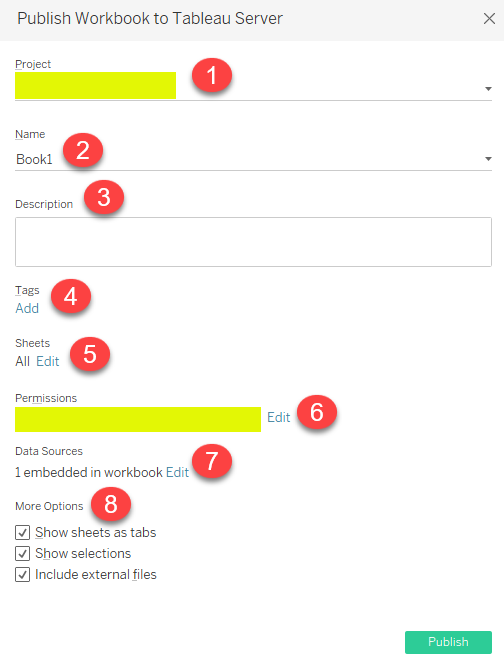
Lets have a understading of these options step by step:
1- The first option that we see asks us where do we want to publish our workbook. Dashboard on server are arranged in projects. This option enables us to publish the workbook to the specific project that we want to.
2- Name: We use this option to give a name to our workbook. By default it picks the name that you save your tableau workbook on your local machine, but you can change it as well .
3- Description : Use this option to add a description to your workbook when you publish them. This comes in handy when you have multiple versions of your book and you would need to track them.
4- Tags : Tags help us to find related workbooks when we browse the server. Tags can be separated using a comma or space. To add a tag that contains a space, put the tag in quotation marks
5- Sheets : Use this option to select the number of sheets that you want to publish, you can also use the option to publish only dashboards in this tab.
6- Permissions: This option is used to control the access of the workbook. By default the permission for a workbook is inherited from the project you are publishing the workbook. If you want to change the permission level and grant access to specific set of users/AD groups , you can do it from here.
7- Data Sources: This option is used to set the authentication types. The available authentication types depend on the connection type, and they can include one or more of the following:
- Prompt user: Users must enter their own database credentials to access the published data when the view or workbook loads.
- Embedded password: The credentials you used to connect to the data will be saved with the connection and used by everyone who accesses the data source or workbook you publish.
- Server run as account: A single Kerberos service account will be used to authenticate the user. On Windows this is the account that Tableau Server runs as. On Linux it can be any Kerberos account.
- Viewer credentials: The viewer’s credentials are passed through to the database using SSO
- Refresh not enabled or Allow refresh access: These options appear when you publish an extract of cloud data such as from Salesforce, and database credentials are needed to access the underlying data.
8- More Options: Select the Show Sheets as Tabs check box to provide tab-based navigation. How sheet tabs are configured also impacts permissions. When a workbook shows sheets as tabs, workbook-level permission rules are applied to the sheets. When the sheets are not shown as tabs, any changes made to workbook permissions do not apply to the individual sheets If your views contain information that isn’t available to the server or other users, you can use the Include External Files option when you publish. With this option, you can include an Excel, CSV, or other data source file local to your computer.
Hope you had a good time reading through and now have a better undersatding of options available while we publish our workbook on the tableau server.
Happy Learning!
@sources tableau kb